Cheese cheese is a fairly rich fermented milk product, usually salty.
Making cheese at home is not difficult.
You just need to know a few simple rules.
And most importantly, you must know exactly what flavor you want to get.
Classic feta cheese is a salty cheese with a fairly pungent taste.
The high concentration of salt in the brine and in the cheese itself makes it possible for its long-term storage.
In addition, during this time the cheese ripens, acquires a specific taste and smell, “stands”, as they say.
But the recipe for young sweet cheese is more popular.
Freshly prepared, it has a delicate sweetish taste. Children usually like it very much.
Of course, it is better to take homemade milk.
If you are confident in the seller, use it without prior preparation; if in doubt, pasteurize it.
A mandatory requirement for milk is that it must be fresh, without the slightest sign of souring.
To make homemade cheese, you will need:
- milk – 1 l
- salt – 1 tbsp.
- eggs – 3 pcs.
- sour cream – 200 ml
- kefir – 100 ml
How to make homemade cheese:
1. To prepare homemade cheese, be sure to use all the freshest ingredients. The milk must be the freshest; you can buy it at the bazaar from grandmothers or go to the village and buy it there. This will make it more likely that the milk is rich and fresh.
But if you do not have the opportunity to purchase homemade full-fat milk, you can replace it with pasteurized milk.
Of course, in this case the nutritional value of the product will be lower, and the taste will not be as creamy and delicate.
But this also has its advantages - such a low-fat product will result in a dietary and practically low-fat dish.
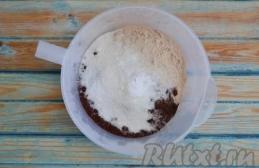
2. So, put the milk in a saucepan, add salt. Place the pan over high heat and bring the milk to a boil, stirring constantly.
If you like salted cheese, use 1 heaped tablespoon, and if moderately salty, use 1 heaped tablespoon.
3. Beat the eggs and add them to the milk after it boils. Mix well and continue cooking.
4. Then add sour cream (preferably with a fat content of more than 21%), mix, then kefir. Mix everything thoroughly and continue cooking over low heat for 5-7 minutes. The milk should curdle and the whey will be released.
5. Prepare clean gauze, fold it in four layers and place it in a colander, which we place on a bowl (saucepan).
6. Pour our mixture into a colander with gauze, let the whey drain into a bowl.
7. Then we cover the drained cottage cheese with the ends of gauze and place some kind of pressure on top, for example, a jar of water. The larger the jar, the faster all excess whey will drain.
8. Leave the cottage cheese under pressure for 2-3 hours, then remove the pressure, free the cheese from the gauze and put it in the refrigerator.
Our homemade cheese is ready!
From this amount of products you get about 350-400 grams of cheese.
You can accordingly increase the amount of ingredients by 2-3 times to get more finished product.
Brynza is a pickled cheese made from goat, cow or sheep milk and has a slightly salty taste. It is ideal for sandwiches, and is also included in many famous appetizers and salads and is used as a filling for baked goods. This product not only has an excellent taste, but is also very useful, including vitamins, microelements and minerals necessary for the body. Children especially love this fermented milk dish.
Calorie content varies from 160 to 260 kcal per 100 g, which makes the delicacy a good option for a healthy diet. The specific figure directly depends on the fat content of the raw materials from which the cheese is made. Let's look at step by step and with photos how to make cheese according to various recipes.
Simple cheese at home
Homemade cheese is prepared only from natural milk; even the richest and highest quality store-bought analogue will not work here. This salty cow's milk cheese is simply incomparable.
Ingredients for 10 servings:
- Vinegar 9% - three large spoons;
- Three liters of milk;
- Salt - a large spoon.

The cooking instructions are as follows:
- Bring the milk to a boil. Add vinegar and salt. The mass should curdle, so don’t turn off the flame for another two minutes. Using a colander and cheesecloth, strain the mixture and remove the whey liquid;
- Place something heavy on top (a clean stone, a pan of water) to give the mass the desired shape, and refrigerate for an hour;
- Cut the fermented milk product into large pieces and serve cold.
Classic feta cheese is simply ideal for a quick, healthy breakfast.
Recipe without sourdough
This feta cheese recipe consists of sour cream, milk and chicken eggs. The fattier your ingredients, the more product you will get. But you can also take products with medium fat content - they will be used in this recipe.
Ingredients for 6 servings:
- Three eggs;
- Milk – liter;
- Salt - a tablespoon;
- Sour cream 20% fat – 200 g.

Cooking plan at home:
- In a deep container, combine eggs and sour cream. Beat everything thoroughly with a mixer until smooth;
- Next, pour milk into a separate pan and add salt (you can take 1.5 or even two large spoons so that the cheese ends up more salty). Place the pot on the fire and bring the mixture to a boil;
- Add the sour cream and egg mixture to the boiling salted milk in a thin stream, and do not forget to stir all the time;
- Cook everything, stirring constantly, over low flame for five minutes. The liquid part will gradually coagulate and turn into small flakes. Then whey is formed, and the main mass will be like tender large clots. Try not to overcook, otherwise the cheese will be hard;
- Remove the container from the flame and let cool for 10 minutes. Then take a sieve, which is covered with 4 layers of gauze and throw the contents there. Be sure to place a deep bowl so that the whey can drain into it;
- Squeeze out the cheese mixture and tuck the ends under the gauze;
- Place the future product under pressure and put it in the refrigerator overnight;
- You get a lot of whey. Its amount depends entirely on the fat content of the ingredients and the size of the eggs. A variety of dishes can be prepared from whey liquid; it is a very tasty and healthy product;
- After 8-10 hours, feta cheese will be ready at home. Unfold the gauze. There is not a lot of product, but it is prepared with your own hands.

The result is the most delicate and delicious brine cheese, which is similar in consistency and texture to Adyghe cheese.
Soft sourdough cheese
This is an easy and quick feta cheese recipe that can be prepared at home from goat milk in less than forty hours.
Ingredients:
- Sourdough based on pepsin – 10 drops;
- Goat milk - two liters;
- Salt - to taste;
- Unsweetened, full-fat yogurt - two large spoons;
- Water - about two liters.

Cooking process:
- Pour the milk into a deep container, heat it to 30-35 degrees and then add yogurt. Mix everything thoroughly;
- Add the starter, mix again and pour the mixture into a glass container;
- Wrap it in a towel, cover it with a lid and put it in a warm place for an hour;
- After this time, mix the mass, wrap it again and put it in a warm place for 30 minutes;
- Our milk is fermented, and we prepare containers for separating the whey from the curd. Place a colander or several layers of cheesecloth on a deep pan, then carefully drain the milk. Leave the whey to drain for 20 minutes. The curd mass is ready. We wrap it in gauze and place it in a small container for 8-12 hours under pressure;
- To prepare the saline solution, boil water and add salt. Let the mixture cool slightly and then mix with the whey. Pour the compacted curd for 18 hours.
If goat cheese is consumed together with light vegetables for about 5-7 days, then you can lose about three extra pounds during this time. This product is ideal for mono-diets, as it contains all the necessary vitamins and minerals.
Goat cheese cheese without starter
This is a product that is soaked in a salty solution. Therefore, it is not recommended for consumption by people who suffer from gastritis, stomach ulcers, kidney stones and diseases of the cardiovascular system.
Product composition:
- Cottage cheese, salt, sour cream - one tablespoon each;
- Goat milk - two liters.
- If necessary, add a large spoonful of vinegar.

Cooking instructions yourself:
- Pour the goat's milk into a large container. We put it on a small flame and gradually heat it up, add a spoonful of cottage cheese. It can be either homemade or store-bought. Stir the cottage cheese in the milk over maximum heat. As soon as the liquid begins to boil, reduce the heat;
- Add a large spoonful of salt, stir thoroughly, and let the milk continue to simmer over a small flame;
- Add a full spoonful of sour cream on top and stir so it doesn’t burn. After 20 minutes this mass will curdle;
- The curd has separated from the whey. Pour this mixture into a sieve. You can immediately lay 3-4 layers of gauze on it, many housewives do this. The sieve is placed on a wider dish so that all the whey liquid gets into it, then the rest can be used for pies or pancakes;
- We tie the gauze with the contents, put the weight on top, after about an hour we remove it and the goat cheese cheese is ready.
Cut it into pieces and enjoy the taste.
Original recipe
Components:
- Kefir – 200 g;
- Milk – two liters;
- Sour cream – 400 g;
- Six chicken eggs;
- Salt - two large spoons.

Cooking method:
- Add salt to the bowl with milk and place on the flame, wait until it boils;
- Beat eggs with kefir and sour cream, add this mixture to the container from the previous step, and with constant stirring, bring to a boil again. Literally in 5 minutes you will get whey and curd mass;
- Line a colander with several layers of cheesecloth and pour in the egg-milk mixture;
- We wait until the whey drains, and then we wrap the cheese in gauze and put it under a press. The heavier the load, the denser the cheese will end up;
- After 5 hours, place the product directly in gauze in the refrigerator for about two hours and then you can try it.
If you like greens, then to this recipe you can add a bunch of dill, which, crushed, is added to a pan with milk.
Video: Homemade cheese recipe
Homemade cheese, the process of which is completely in the hands of the housewife from scratch, is sometimes much better than cheese from the store with its not entirely healthy additives and “secrets” of production. You will be surprised, but you can prepare many varieties at home: mascarpone, suluguni, feta cheese, etc. In this master class we will talk about feta cheese, since this cheese requires only two ingredients: milk and cheese enzyme.
To prepare cheese at home you will need:
homemade milk;
cheese enzyme;
water thermometer;
a large saucepan or any other container for the stove;
colander;
gauze or thin white cloth;
salt.

Milk has a big influence on the final result - it must be homemade, and the fattier it is, the more cheese you will get in the end. From 10 liters of homemade milk of medium fat content you can make about 1.5 kg of cheese.
Important: if you do not have your own milk, you should buy it only from trusted sellers who monitor the cleanliness and health of their animals. This is due to the fact that the milk in this recipe does not undergo proper heat treatment.
So, pour the milk into a saucepan and then put it on low heat. Don’t go far, as it will heat up quickly (to the desired temperature of 35 degrees).

At this time, you can start breeding Meito cheese enzyme, which can be purchased at any specialized online store. A packet of enzyme is designed for 100 liters of milk, so it must first be divided into 10 parts. Dilute one of the parts with 100 ml of water at room temperature (not hot).

While you are working with the enzyme, the milk will become lukewarm. This is enough, but just in case, check its temperature. If you don't have a water thermometer on hand, you can use a household electronic equivalent, although it must be 100% waterproof. The temperature of warm milk in this recipe does not exceed 35 degrees, so a regular electronic thermometer will cope with the task successfully.

Next, pour the prepared glass with the enzyme into a saucepan removed from the stove, then stir the milk thoroughly. At this stage, your participation in cooking ends for now, since the milk must be left for 20-30 minutes.
Half an hour will pass, and you can return to the future cheese. During this time, the milk will turn into a gelatinous substance, which must be cut with a knife (right in the pan) into small pieces, and then left for another 15 minutes.

The next step is to remove the whey, for which you carefully transfer the mass into a colander with gauze (you need to place some container under the colander to collect the whey). In the future, it can be used to make pancakes, bread, and just drink it. Also, to speed up the process, it would be nice to do a little bending using a regular jar of water.

After an hour, the cheese must be carefully turned over so that the whey drains better. By this time, the mass becomes dense, a clear pattern from the colander appears on it, so you can already remove the gauze.

After another hour, the cheese is filled with brine (whey with salt slightly higher than your taste). There is no need to keep it in brine for a long time - 15-20 minutes is enough.
Please note: if you like your cheese to have holes in it, leave it out of the refrigerator for a couple more hours.

That's it, delicious homemade cheese is ready.
Brynza has been preparing for a long time at home. Every housewife who cares about the healthy nutrition of her family simply must be able to cook cheese. Yes, just cook, because feta cheese it's cooking, it's coagulation product, and not souring, as many people think, for it you do not need to pre-sour the milk.
Brynza The product is very tasty and incredibly healthy. Like any dairy product, it contains a lot of calcium and by consuming it, we take care of the strength of our bones for many years. It helps improve digestion. Eating cheese has no contraindications other than intolerance to dairy products.
Cheese cheese is an excellent snack during the day; it contains few calories and therefore is a dietary product. By snacking on cheese, you do not risk ruining your figure.
It goes great with tea or coffee. Various baked goods are prepared with cheese. It goes well with many foods and is often used in salads.
How to make homemade cheese with vinegar
Brynza can be prepared in two ways. The first method is using vinegar, the second is using rennet.
Today we will talk about preparing feta cheese using vinegar. The advantage of this method is that this method is more accessible and convenient compared to preparation using an enzyme. It is convenient because you probably always have vinegar in your house, unlike rennet.
The enzyme is convenient only if you always have a lot of milk in the house and you will use it several times a week for a large amount of milk.
If you need to prepare a small amount of cheese, for example, from a three-liter bottle, then cheese with vinegar is exactly what you need and what will be convenient and economical for you.
Ingredients for making cheese with vinegar
To prepare cheese with vinegar you will need:
- Homemade milk – 3 liters;
- Vinegar 9% – 50 ml.
Homemade cheese recipe
To prepare feta cheese, you only need homemade natural milk. Milk from the store will not work, it is mostly powdered and nothing good will come out of it.
You need to buy good fat milk. It will need to be refrigerated to mature.
Step 1. The milk should stand until the top peels off well. Then you need to skim off all the cream. Now, of course, you have a question: why then buy full-fat milk? And it is necessary to buy full-fat milk in order for the cheese to turn out as tasty as possible, because not all of the cream rises to the top, some of the cream remains in the milk without rising to the top and it will give the milk exactly the fat content that you need. If the milk is not full-fat, the cheese will not be as tasty; it will be “rubbery,” so to speak. And from the skimmed cream you will get another delicious dairy product, namely sour cream. This way, you will get the maximum benefit; from a bottle of milk you will have a jar of sour cream and a piece of cheese.
Step 2. Now that the cream has been skimmed, pour the milk into a 5 liter pan, remember that milk rises and it is better that the volume of the pan exceeds the volume of the milk. It is best to take a pan made of stainless steel or aluminum; in such a pan it will not stick to the bottom during cooking and the taste will not be spoiled by the taste of burnt milk.
Step 3. Put the milk on the fire.
Step 4: Prepare the vinegar immediately.
Important! You need to bring the milk almost to a boil. It should not start to boil, you need to “catch” the moment when it just starts to boil.
Step 5. As soon as this moment comes, immediately pour vinegar into the milk and stir quickly with a spoon or ladle.
Step 6. The milk will curdle instantly. As soon as you see whey, immediately remove the milk from the heat. If suddenly the milk does not curdle right away, immediately add another 50 g of vinegar, this happens when the quality of the vinegar is poor, this is not a problem and can be quickly corrected by adding more. Don’t worry, there won’t be any smell of vinegar in the cheese.
Step 7. As soon as you remove it from the heat, you immediately need to drain the whey. In order to drain the whey from the cheese, you need a colander lined with gauze; one layer of gauze is enough. Drain the cheese by placing a colander over a pan or bucket. The serum should be preserved, you will need it.
Step 8. Now roll the gauze into a bag. Leave this bag in a colander. Place a press on the cheese; if you don’t have a special press, just place a plate on top and a 1-liter jar of water on it, you can even put a plastic bottle of water. The longer the press sits on the cheese, the denser it is.By making cheese at home, you will gradually determine the density you need and how long your cheese should spend under pressure. If you are making it for the first time, place the cheese under pressure for 30 minutes.
Then wait - let the cheese cool down. While the cheese is cooling, prepare the brine.
How to prepare brine for cheese?
For the brine, you will need exactly the same whey that is left. Per liter of whey you need to put 1 tablespoon of salt. Again, by doing it regularly, over time you will determine for yourself how much salt you need, more or less. But for the first time, we recommend this exact amount of salt, so you will get medium-salted cheese.
Dip the cooled cheese into the brine and place it in the refrigerator overnight.
In the morning or just after 8-10 hours, remove the cheese from the brine.
Now your cheese is completely ready to eat.
Yield of cheese from 3 liters of milk
Three liters of milk yield 400-600 g of cheese as a final result after soaking in brine. Without soaking, you get 300-500 g of cheese. Weight does not depend on the preparation method, it depends on the quality of the milk, more precisely on its natural density.
If you buy milk at the market, it is better to note what weight of cheese you get from the milk purchased from this particular seller and choose for yourself a seller where you will have the maximum yield of cheese from milk in order to get not only the maximum benefit, but also economic benefits for your family budget.
How to diversify cheese
Bryndza is one of those products that can be consumed quite often. But sometimes you still want variety. Here you will be helped out by several variants of the same cheese.
Cheese cheese with paprika
Cheese cheese with paprika turns out very tasty, paprika gives it a piquant flavor. It couldn't be easier to prepare. No special skills are needed here at all.
You just need a couple of packs of ground sweet or hot paprika, depending on your taste.
When you have already prepared your cheese and kept it in brine, simply coat it generously with paprika on all sides. Place the cheese in paprika in the refrigerator for a few more hours, preferably 10 hours, so it will soak well and acquire an incredible taste.
Then just consume it as usual.
Cheese cheese with dill
Brynza with dill is just as easy to prepare. You just need dill, the amount to suit your taste.
Chop the dill as finely as possible.
Then, when you have almost completely drained the cheese, or rather, you should have a little bit of whey left in the pan, about a glass. Pour dill onto the drained cheese and quickly stir the mixture with a spoon. Then pour off the rest of the whey and while it is still not completely glass, stir again, so you can mix everything well.
Cheese cheese with garlic
Cheese cheese with garlic is already a cheese for garlic lovers. But the main thing here is not to overdo it. After all, the cheese is initially hot and trying to make it “more garlicky” can ruin the product. For cheese weighing 500 g, about 4 cloves (large) of garlic are enough.
Next again, as when preparing with dill. Drain the cheese and leave a glass of whey in the pan. Add crushed garlic to the cheese and stir quickly, then pour off the remaining whey and, while it is still wet, stir again well so that the garlic is well distributed.
Then put it under the press, and then into the brine.
Prepare delicious cheese at home! Experiment and have a lot of fun with it!
Enjoy your meal!
Great( 5 ) Badly( 0 )
Brine cheeses include Tushino, Chanakh, Kobi, Ossetian cheese and feta cheese. They ripen and are stored in brine, which determines the characteristics of the microbiological and chemical processes occurring in the cheese. Let's look at the production technology and recipe homemade cheese made from milk.
Cooking feta cheese
Brine cheeses are made from sheep's or cow's milk, and often from a mixture of both.
Photo of feta cheese
Homemade cheese is made from sheep's and cow's milk.
Coagulation temperature is 28-31°T, duration is 35-45 minutes.
The curd is laid out on a waste table with sides, covered with a damp serpyanka, and cut after 10, 15 and 40 minutes.
The cheese mass, wrapped in serpyanka, is pressed in two stages - first at 5 N per 1 kg of mass, and then at 10-15 N per 1 kg of mass.
The pressed mass - a layer of feta cheese - is cut into bars with sides 10-15 cm and a height of up to 10 cm and a weight of 0.5-1.7 kg.
Salting cheese
According to technology, cheese is salted for 24 hours in brine and 24 hours with dry salt.
The mass after 48 hours of salting is taken as the initial mass when calculating its further changes.
At the end of salting, the cheese is placed in barrels along with brine with a concentration of 20-22%.
The weight of cheese in a barrel along with brine is from 50 to 100 kg, storage temperature is 10-12 ° C.
Cheese made from raw milk must be in brine for at least a month, and from pasteurized milk - 2 weeks.
After 29-30 days of storage, the brine in the barrels is replaced by filling the cheese with 17-18% brine.
|
Read the article |
Maturation
The process of ripening cheese is unique.
In particular, milk sugar is preserved in it for a long time, which should be explained by its large specific surface area and the ability to quickly salt the cheese mass that has not been processed to the grain stage.
There is no deep breakdown of protein in cheese, despite the fact that up to 40% or more passes into soluble form.
Of the 33.4% soluble protein, casein nitrogen accounts for 27.7%, and peptone, albumen and amino acid nitrogen accounts for only 5.7%.
Obviously, under the influence of salt, peptization of the protein occurs and its transition to a soluble (according to Kjeldahl) form.
The degree of maturity, according to Shilovich, even in 100-day-old cheese is at the level of 25-30°, which also confirms the suppression of microbacteriological and enzymatic processes in cheese.
Change in the mass of cheese
During storage, the weight of the cheese changes significantly.
When stored for up to 30 days, it decreases significantly, then stabilizes, after 120 days it increases, and by 180 days of storage it stabilizes again.
Concentrated brine and syneresis of the cheese mass contribute to a decrease in moisture content and mass until the relative leveling of the salt concentration in the brine, as well as in the aqueous phase of the cheese (14-18%), which corresponds to stabilization of the mass by 30 days of age.
|
Read the article |
After the attenuation of diffusion processes, the hydration properties of the protein begin to manifest themselves more strongly, as a result of which the mass and moisture content in feta cheese increases.
Upon reaching a certain swelling limit, the mass of the cheese stabilizes again.
Homemade cheese recipes
Making cheese using pepsin
Pepsin is a digestive enzyme that promotes milk coagulation.
To prepare homemade cheese using pepsin, you need 3 liters of milk, a little pepsin (literally on the tip of a knife), 1 tbsp. a spoonful of salt and a liter of water.
Preparation:
- Heat the milk (to prepare feta cheese, it is better to use homemade cow or goat milk) to 30 °C.
- Dissolve pepsin in a glass of water and pour into milk, always stirring it.
- If the milk has curdled, remove from heat.
- Place the original cooled cheese mixture onto cheesecloth.
- After the whey has drained, roll up the gauze and place the mixture under a press.
- Dip the cheese into a saline solution (1 tablespoon per liter of water).
A simple recipe for cow's milk cheese at home
Required: 3 liters of cow's milk, 3 tbsp. spoons 9% vinegar, and of course 1 tbsp. spoon of salt.
Preparation:
- Bring the milk to a boil and add salt and vinegar. Stir and boil for 3 minutes.
- Drain in a colander (on which you place cheesecloth).
- Once it drains, wrap it in gauze and put it under a press. You can try the cheese within an hour and a half. Store in brine.
Classic recipe
Preparation:
- To make feta cheese at home you need 1 liter of milk (preferably with high fat content), 2 tbsp. spoons of sour cream, lemon juice - 1 tbsp. spoon, 1 teaspoon of salt and a glass of water.
- Pour milk into a container and place on fire.
- If there are signs of curdling, pour lemon juice into the milk, stir and heat for 1-3 minutes.
- Drain the mixture into a colander lined with gauze, let it drain and wrap it in gauze. Place under pressure for an hour or two.
- Cut cow's milk cheese and add brine.
- After half an hour, you can taste the homemade cheese produced.