Dried apples are a great delicacy and one of the oldest types of preparing apples for the winter. Thin slices are crispy on the outside and soft, sour on the inside; Most vitamins are preserved when dried.
In winter, they can be soaked and used as a filling for pies, a base for compote or part of a dessert, or they can be eaten like chips: only unlike this snack, dried apples are a natural, healthy and low-calorie product. Apples dried according to all the rules are not brittle and retain their taste and aroma.
How to dry apples in the sun
The oldest type of drying possible and the longest - but more vitamins are preserved under the sun's rays. Sort the apples and make sure they are not rotten. Wash all the fruits and dry them, then remove the core and cut them - you can cut them into slices, or you can cut them into circles, but both should be very thin so that the apples dry quickly without having time to rot.
In theory, this is a type of drying where you can peel the apples, but they still run the risk of losing their shape a little (although the taste, of course, will not change). Soak the slices or circles in a saline solution (very weak, 1 level teaspoon of salt per liter of water) - briefly, about 3 minutes, so that the slices do not turn yellow. If yellow suits you, you can skip this step.
Dry. Place all the slices on a baking sheet or on a wooden tray, in a maximum of two rows, and place in the sun. It is best if they have access to fresh air (preferably a slight breeze). Turn the workpiece several times a day so that the slices dry evenly. Drying apples in the sun lasts about 4 days, it depends mainly on the weather (if it is sunny all the time).
How to dry apples in the oven
A good recipe for urban conditions, and the drying time takes 8 hours. Select apples for drying, wash them and cut out the core. If you are drying them in slices, you can simply cut each fruit in half first, but if you want to dry the apples in slices, it is better to use a special tool to remove the core from a whole apple. Then chop them.
The slices or circles should be approximately the same thickness - up to 8 mm. Place baking paper on a baking sheet and place the apples on it (so they don't stick if something goes wrong). Set the oven to 50 degrees, then gradually increase to 80 and finally reduce again to 40-50 degrees. Once an hour, open the oven and turn the slices or circles over.
In the first hours, it is better to keep the oven door slightly open - at this time the moisture comes out of the apples most actively, and they are being dried, not baked. You can also make sweet dried apples - then before putting them in the oven, soak the sliced fruit in sugar syrup (but do not cook in it).
How to dry apples in the microwave
One of the fastest methods - it takes two and a half minutes for each portion. In this option, the main thing is not to dry out the apples. Place washed and cored fruits, cut in any way, on a plate covered with a piece of linen cloth (cotton is also suitable). Microwave at 200 W for 2.5 minutes. If you need to dry the apples after this, put them in the microwave for another half a minute.
How to dry apples in an electric dryer
Faster than in the oven and healthier than in the microwave. Wash and cut the apples in the same way as for any other method, and dry on special sheets at a temperature of 70-80 degrees, and then lower it to 60. Drying will take approximately 6 hours.
In the summer, fruits, berries and herbs are cheaper; many people have their own dachas and vegetable gardens, so housewives strive in different ways to preserve their harvest for the winter. There are several ways, but the most convenient way is to dry the workpieces using a microwave oven.
This process is simple and not too labor-intensive. Suitable for different berries: raspberries, strawberries, blueberries, black and red currants, bird cherry and rowan. Initially, they need to be washed very well, dried to remove excess water, and then you can begin the main drying. To do this, you need to place them evenly on the microwave plate and turn it on at 200 W.
Drying will only take a few minutes, after which you need to check if they are dry. If not, you can turn the berries over and put them in the microwave for a few more minutes.

You can also dry any fruits you have. They must be processed before drying. To do this, wash thoroughly, dry and remove, if necessary, the core. Then cut into slices or cubes and start drying in the microwave. The power is set to the same - 200 W. The drying period depends on the size of the chopped fruit.

Usually three minutes is enough, but if necessary, you can increase the time. Using a microwave oven, many housewives dry herbs, which, with this type of heat treatment, completely retain their beneficial properties. It can be dried either in twigs or finely chopped.

Before drying, the greens must be washed and slightly dried. Only then can it be placed in the microwave. For finely chopped greens, a microwave oven power of 180 W and two to three minutes is sufficient. But for drying greenery with twigs, it is better to add another 20 W of power and increase the amount of time to three to four minutes.
You can dry berries, herbs and fruits using a microwave oven at any time of the year. This is very convenient, since it is very difficult to dry workpieces for the winter without it. You can also dry preparations for the winter using a conventional oven, which is similar in drying technology to using a microwave oven.
When choosing a microwave oven for preparing preparations for the winter, you can be sure that they retain all the necessary vitamins and nutrients, which you simply cannot do without during the period of vitamin deficiency.
Already in the summer, a thrifty housewife begins to think about what she will feed her family in the winter, when prices for fruits, vegetables and herbs “bite.” During the harvest, there is intense work - everyone is preparing compotes, juices, jams, canned goods, but the simplest and cheapest preservation option is drying.
The main advantage of such storage of products is the preservation of all nutrients and vitamins, flavonoids, and microelements. Fiber (pectins) improves digestion, microelements improve health and stimulate brain activity.
It is also important for the housewife that dried products take up little space. We will learn more about how to properly dry apples in the microwave for the winter, as well as prepare mushrooms and herbs, medicinal and aromatic herbs.
How to dry apples in the microwave at home
Rules for preparing apples:
- To prepare dried apples, it is advisable to take winter sour varieties. If you still dry the summer harvest, it is better with the skin, but the quality of the harvest will be lower;
- the fruits must be selected undamaged and without worms;
- Wash and dry the apples thoroughly;
- cut the apples into small slices up to 5 mm, remove the core (for compote, you don’t have to remove it);
- It is recommended to soak the slices in salted water (20 grams of salt per liter of water) for 3-4 minutes. It will lighten dried apples, protect against insects and increase shelf life.
Important. It is better to dry apples from your garden with the peel, they contain many useful substances. And if you bought the fruit in a store, it is better to do without the peel.

Let's look at the step-by-step process - how to dry apples in the microwave for the winter:
- Place the apple slices on a plate covered with a cotton cloth in a thin layer;
- put in the microwave, dry at 200 watts for 1 minute. The drying time depends on the size and juiciness of the pieces;
- remove the plate, turn the slices over to the other side and dry again at the same power for 1-2 minutes;
- every half a minute check the condition of the apples, if after turning them off they are damp, turn them on again for 20 - 30 seconds;
- When the slices are ready, the skin will become dull and the flesh will not stick to your hands. The slices will become creamy and soft to the touch;
- Remove the pieces from the oven and dry them additionally in the open air by spreading a cloth towel on the table and laying out the slices in one layer.
It is better to store any dried fruits in a glass container or in a durable fabric bag in a cool, dry place.

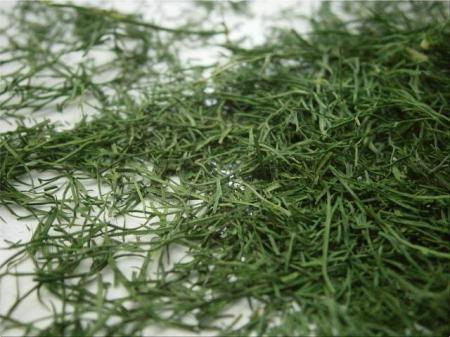
Drying greens and herbs
The microwave can handle the preparation of dried herbs and fragrant herbs, which add a special aroma and taste to dishes. And if the greens are grown in your own garden, then it will be the cheapest and most environmentally friendly product. Usually dill, parsley, basil, mint, celery, lemon balm and other plants are dried.
Important. To preserve the natural aroma and taste, drying herbs and herbs should be done as quickly as possible.
Step-by-step instructions for drying dill in the microwave:
- Wash the branches without stems and place in a colander;
- chop finely, place on a paper or cotton towel in a thin layer;
- cover with the same towel on top so that the greens do not burn;
- put a plate of greens in the microwave, press a weight on top, for example, put a glass of water;
- dry for 3 minutes at a power of about 800 W;
- Periodically (every 30 seconds) check the degree of readiness; you can extend the process by 10 - 20 seconds if the greens are damp.
Store herbs in a cool, dark room in airtight bags; shelf life is one year.

Important. Well-dried leaves turn pale, become dry and brittle.
Drying mushrooms in the microwave
Dry mushrooms are a good help for the housewife in winter; you can diversify the menu and save money. Is it possible to dry mushrooms in the microwave, and what types, they contain a lot of moisture, can a microwave oven handle it? We'll tell you how to effectively prepare dried mushrooms.
It is advisable to dry tubular and marsupial types of mushrooms (porcini, boletus, boletus, morels, truffles), while lamellar ones do not taste bitter and dry well honey mushrooms and champignons.
Preparation process:
- mushrooms must be selected that are dense, whole, and without rot;
- There is no need to wash them, they will absorb a lot of moisture and will not dry out for a long time. Thoroughly clean the mushrooms with a brush and wipe with a damp cloth;
- for noble mushrooms, the caps are cut into slices, the stems into 2 cm slices, for chanterelles, honey mushrooms, butter mushrooms, only the caps are taken and cut into 1 cm slices;
- It is advisable to dry (wither) the mushrooms before the main drying in the microwave; this can be done in any room or in the sun. If they are not dried, they may release juice in the oven.

How to dry mushrooms in the microwave:
- place the chopped mushrooms on a wire rack, dish, tray, spreading a cloth napkin or towel;
- Place in the microwave for 15 minutes at minimum mode 100 - 180 W. The duration of processing may vary, it all depends on the thickness and moisture content of the slices;
- remove the dish, drain the accumulated liquid, ventilate the oven for 5 - 10 minutes from moisture;
- do a second drying, then a second airing, and so on several times;
- After drying, place the mushrooms on a table in the open air and leave for half an hour.
Important. After each cycle, you need to check the mushrooms. If they quickly break and crumble, it means they are too dry. Properly dried mushrooms should be flexible and not break immediately.
Mushrooms should be stored in glass containers or in durable moisture-proof bags in a dry place with good ventilation. The best, but expensive option is a vacuum container.
Drying berries
You can also dry berries in the microwave, as they are much healthier than in the form of jam. It is better to dry large berries - strawberries, grapes, cherries. For aromatic tea and compote, currants and raspberries (slightly unripe) are dried; you can also prepare rowan berries, blueberries, and chokeberries. Dried berries retain all the beneficial substances, and chokeberry (aka chokeberry) becomes less tart. The berries are selected whole, firm, and collected in warm, sunny weather.

Berries are dried almost the same way as greens:
- lay out on a tray or dish covered with a paper towel in small portions;
- cover the top with the same towel;
- the power is set to 200 W, the drying time is 3 – 5 minutes, since there is more moisture in the berries;
- It is necessary to dry in several stages, constantly checking the degree of readiness (every half a minute).
There are many options for using dry preparations, but first they need to be washed with running water and then soaked for several hours in cool water. Cooking will become easier, and the taste and aroma will be brighter.
10Diets and healthy eating 12.10.2017

Summer this year did not please us with warmth, and autumn presented many surprises in the form of torrential rains and devastating hurricanes. Accordingly, the harvests left much to be desired. But apples have pleased many with their abundance, and now our task is to preserve them for the winter. The jam and marmalade have been cooked, compotes and juices have been rolled up, many craftsmen have supplied wine, but there are still a lot of apples.
I suggest drying apples, this is a great way to preserve the nutrients that apples are very rich in, and in winter, when there are so few local fruits, they will be very useful. And today we, dear readers, will look at how to dry apples at home, we will figure out how to do it correctly in order to preserve their maximum benefits.

What are the benefits of apples?
First of all, let’s figure out what benefits apples bring to us, what is their value. Despite the fact that almost 80% of fresh apples consist of water, their benefits for our body are enormous. They contain complex polyphenolic compounds that protect the body from premature aging, from the development of oncological processes, and from disruption of the nervous and endocrine systems.
Organic acids, glucose, fructose, sucrose, tannins, essential oils, and pectins were found in apple fruits. Apples are rich in vitamins: ascorbic acid, carotene, vitamins A, E, H, rutin, nicotinic acid, vitamins B1, B2, B3, B6, B8, B9.
Apples are rich in the macroelements potassium, sodium, calcium, phosphorus, and magnesium that are essential for maintaining health. 28 microelements were also found in apples, including iron, copper, zinc, iodine, molybdenum, manganese, and others.
Apples are the most important general strengthening product; they
- Improves digestion;
- Strengthen intestinal motility;
- Cleanse the body of toxins;
- Regulate blood cholesterol levels;
- They have diuretic and choleretic properties;
- Relieves inflammatory processes;
- They have disinfectant properties.
Apples are recommended in dietary nutrition for anemia and vitamin deficiencies, constipation, edema, jaundice, hypertension and atherosclerosis, and obesity. When baked, apples are useful for inflammatory diseases of the stomach and intestines, kidneys, and liver.
Read more about the benefits of apples in the article. You can read about the medicinal properties of apples in the article.
How to dry apples yourself for the winter
There are several ways to dry apples for the winter, and I will try to sort them all out. I remember how as a child, in the village at my grandmother’s, we cut apples into slices, strung them on threads, and hung these apple beads on the shady side of the house under the roof, covering them with gauze from insects. This natural drying is the most correct; it allows you to preserve the maximum amount of vitamins. But this method is not available to city residents, and it’s already autumn, it’s too cold for drying in the fresh air, so we’ll dry the apples in our own apartment.

Preparing for drying
Before drying, the fruits need to be prepared. Summer and autumn varieties that have a sweet and sour taste are well suited for drying. Fruits with thin skins dry faster. Wash, dry and remove the core. To remove the core, you can use a special device or do it with a knife, first cutting the apple into 4 parts.
You should not prepare a lot of apples for drying in advance; their pulp oxidizes in air and darkens. It is better to prepare one portion that you can dry.
You need to cut it as thin as possible, then the drying time will not be long. To do this, it is best to take a special grater, which is called a slicer; the apples are cut into thin slices and dried very quickly. It is better not to remove the peel if the apple trees grow in an environmentally friendly place; the peel contains a lot of useful substances and it is worth preserving them.

How to air dry apples at home
It is quite possible to dry apples in a house or apartment without an oven or dryer; you just need to cut them thinly and lay them out in one layer on a clean cloth or paper. Drying occurs naturally without exposure to high temperatures, which means that all the beneficial properties of the dry slices are preserved.
Watch the video to see how these tools can quickly cut fruit into thin slices and quickly air dry them.
How to properly dry apples in the oven
The simplest thing is to dry apples for the winter in the oven found in every home. It does not make a significant difference where to dry apples, in the oven of an electric or gas stove, it is important at what temperature to dry the apples. The recommended temperature is 50 - 60 degrees.
It’s good if the oven model allows you to set the exact temperature, then you don’t have to worry about drying out the fruit. Most of our ovens do not provide such low temperatures, and it is difficult to set high temperatures accurately, but there is still a way out. Set the temperature to the lowest setting and open the oven door. It is advisable to heat the oven in this state and place a thermometer in it. We adjust the temperature by opening or closing the door. When I didn’t have an electric dryer, this is how I dried apples.
The drying process itself is very simple, the main thing is not to overdry the slices. It is best if the slices are thin; in this case, the drying process will go faster.
The fruits are cut, now we cover the baking sheet with parchment or baking paper, arrange the slices in one layer and put them in the oven. It is advisable to stir them several times during drying so that they dry evenly on all sides. After 2 - 3 hours, it is advisable to turn off the oven and leave the baking sheet with apples outside until it cools completely. Only with cooled slices can you correctly assess whether the apples are properly dried. Several of these approaches and delicious, aromatic and healthy apple slices will be ready.
Drying apples in an electric oven is even easier than in a gas stove oven. Modern electric stoves are equipped with precise temperature controls and fans, and they have the ability to turn on an even supply of heat throughout the entire chamber, which makes the process extremely easy. You just need to periodically open the oven so that excess moisture does not accumulate in it.
After watching the video, you will find out how easy it is to carry out such drying.
How to properly dry apples in an electric dryer
An electric dryer is an extremely useful thing in the house; it can be used to dry not only fruits, but also mushrooms, berries, and medicinal herbs. The structure of the dryer is very simple, it has several lattice trays that are installed on top of each other, and apples cut into slices are laid out on them.
There are different models with different prices, we choose for ourselves what suits us best. In the dryer, the drying process is simple, the temperature is set with a special regulator, lay out the slices, turn it on and that’s it. All that remains is to monitor and not forget about safety precautions, because this is an electrical device.
How long to dry apples in the dryer? Be prepared that it will take a lot of time, from 4 to 15 hours, it all depends on the density of the fruit and the thickness of the slices. I stretch the drying process into several stages, after 2 - 3 hours I turn off the dryer, let the apples cool, taste them, and if they don’t seem dry enough to me, I turn the device on again.

At what temperature should you dry apples in an electric dryer?
The temperature for drying apples is constant, and wherever you dry them, it should not exceed 60 degrees Celsius.
Drying apples in the microwave
You can dry apples in the microwave, although I personally have not used this method. But such a method exists, and I decided to tell you about it. My friend often dries it this way. To dry fruit in a microwave oven, you need to thinly slice it, place it on a plate in one layer, put it in the oven and turn it on at full power. Apples dry very quickly under the influence of ultra-high frequency waves, so we set the time to 3 - 5 minutes and see what condition our slices are in.
If there is a lot of moisture on them, put the plate in the oven again for a few minutes. Don’t be upset if the first time you get coals instead of elastic dry slices, this requires experience, everything will depend on the type of apple and the thickness of the slices. My advice: set the minimum time, then get used to it.
I suggest watching a short video that will give you an idea of how to dry apples in the microwave.
Other ways to dry apples at home
Apples dry perfectly on a central heating radiator; I also dried them this way when I didn’t have an electric dryer. Apples should be prepared in the usual way; small portions should be placed in clean cotton bags. Roll the bags into rolls and place them on the batteries, turning them over periodically. A few days are enough for the slices to lose moisture. After this, be sure to dry them in air, laying them out on the table so that they are ready for storage for the winter.
Many people dry apples by hanging a special grill over the burners of a gas stove. I do not advise you to use this method, since gas combustion products are extremely harmful to humans.
How to determine the readiness of dried apples
Properly dried slices should not crumble or break, they should be elastic, retain the apple flavor, but they should not contain moisture. This is usually learned through experience; over time, doubts no longer arise. Pay attention to the skin, it should darken.
How to dry apples in the microwave and preserve them until late spring? This question is often asked by those who have a large number of fruits ripening on their trees at the end of the summer season. It’s a shame to throw them away, and it’s not worth it. After all, from fresh apples from your own garden you can make dried products, which in the harsh winter will be useful for preparing delicious compotes and fillings for pies.
at home using a microwave oven
Required ingredients and equipment:
- fresh fruits - you can take any quantity;
- fabric bag;
- flat glass and large plate;
- knife, ;
- cotton or linen fabric.
Fruit selection
Before drying apples in the microwave, you should collect the required amount of fruit. They can be of different varieties, sizes, colors and acidity. The main thing is that the main component is not too juicy, otherwise it will dry out for a longer time.
Fruit processing
In order to understand how to dry apples for the winter, you should remember that such a product is prepared exclusively in chopped form. To do this, you need to wash the fruit, then remove the seed box and cut the fruit into thin slices (you can use circles). In this case, it is advisable to leave the peel in place if it is not too hard and is not covered with wax (in the case of a store-bought product).
How to dry apples in the microwave: step-by-step process

To stock up on dried fruit for the winter, you should take a flat glass plate of a size that will easily fit into your kitchen appliance. Next, you need to place chopped apple slices on the dishes in one layer, cover them with linen cloth or then distribute the fruit again, etc. There should be no more than 5 such layers. After this, the plate must be placed in the microwave and dried at 200 W for about 3 minutes .
It is especially worth noting that it is advisable to turn the apples regularly during drying. This way they will lose as much moisture as possible, retaining all the useful elements. The preparation time for such a product for the winter depends entirely on what product you use for it. If the apples are very juicy, then they can be dried in the microwave for 7-9 minutes intermittently. If you purchased a different type of fruit (drier), then only 3-5 minutes are enough to prepare it.
How to use finished products
Now you know how to dry apples in the microwave so that they do not burn, but are evenly dehydrated, while retaining all the beneficial substances. These fruits can be used in different ways in winter. The most popular drink made from dried products is ordinary compote. In addition to apples, you can additionally add dried apricots, raisins, apricots and other dried fruits. In addition, harvested fruits are used as a tasty and aromatic filling for pies. To do this, grind it in a blender, mix it with sugar and ground cinnamon, and then apply it in a thin layer to the dough.

It is worth noting that such products should be stored in a fabric bag or jar in a dry and warm room.